Step 1: Download Java SE Development Kit. Download Java
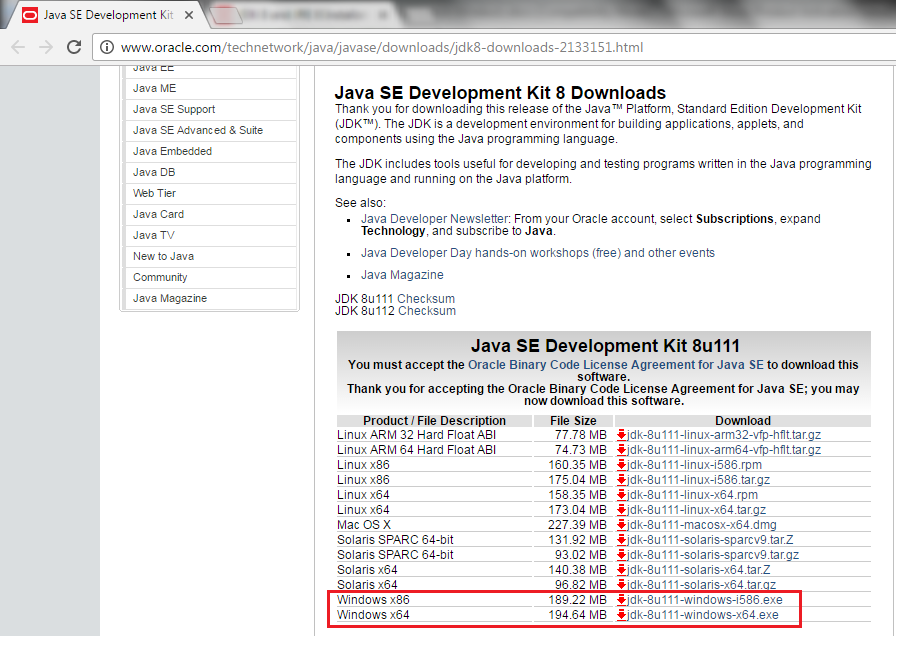
Step 2: Click on executable(.exe) file and then follow the instructions to install Java in Windows Operating System.
Step 3: Click on Start Menu
Step 4: Right Click
on “Computer” and then click on “Properties“

Step 5: Click on “Advanced system settings”.

Step 6: Click on “Advanced” tab and then click on “Environment Variables”

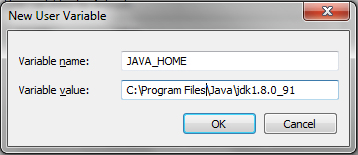
Step 7: Click on “New…” button to add JAVA_HOME variable

Step 8: Provide “Variable name”à JAVA_HOME
“Variable value”à Java installation path
Step 9: Select “Path” from System variables and then click on “Edit…” button

Step 10: Add Java installation path with 'bin' directory in “Path” variable.

Step 11: Verify Java Installation. Open “Command Prompt” and then type “java -version”. You should get java version details as below screenshot, it means Java has been successfully installed in your system. Cheers !!

No comments:
Post a Comment